Battery tab welder
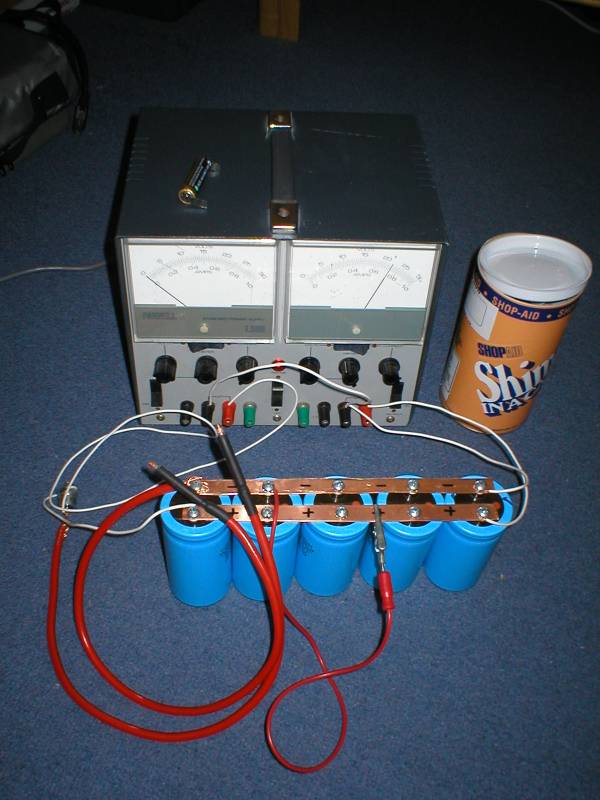
Some years ago I needed to weld metal solder-tags onto some nickel-cadmium batteries. A nearby surplus supplier had some 120,000uF computer-grade capacitors in stock for an absurdly cheap price, so I ordered five of them. An SCR was procured from Farnell, and the welder was born…
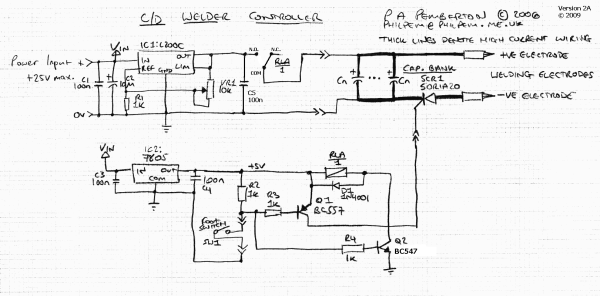
I ended up using an L200CV linear regulator to regulate the capacitor voltage, and a 7805 to generate the gate drive for the SCR.
I built this thing back in 2005, so all information here is provided on an as-is basis!
As of 2024 I still occasionally use it to build and repair battery packs - but if I were to rebuild it, I'd use a small variable buck converter to charge the capacitors. As it's a linear regulator, the L200C tends to get quite hot during extended use, especially at low capacitor charge voltages. I'd also like to add MOSFET switching of the output, and a “double pulse” mode to match commercial welders.
Circuit diagram
Bill of materials
- 5x 120,000uF capacitors
- I used these because they were available cheaply from a surplus supplier. A bank of similar screw-mount “computer grade” capacitors should work.
- It's possible that a 1-Farad “car audio” capacitor might work, but this will have a lower voltage rating (and thus lower weld power). Aim for 25V or higher.
- Copper sheet, K&S #259 (0.025in thick, 4in x 10in sheet)
- Used to make the busbars.
- IRF 50RIA20 thyristor (SCR)
- Weld power switching
- High-current cable and crimp connectors
- “Car audio” cable should be sufficient. Aim for pure copper, 8AWG or so.
- Welding electrodes
- You may have to make these yourself. This can be done with a piece of 5mm copper rod – use a file to shape the tips.
- Nickel sheet or strip
- This is now commonly available on eBay
- If you're in the US, you can buy 0.003in thick nickel shim stock from McMaster-Carr under part number 9707K33.

